Measure me
A very simple exercise if you have the right equipment but almost impossible if you don�t so I would now like to take you back now to the 1960s. At this time here in Britland there was no requirement for a licence to own a shotgun in fact you could buy shotguns mail order and from other general outlets, how things have changed here. So unless you purchased a gun new deciding how healthy it was in the barrel department was as difficult then as it is today if you are unable to take a true measurement of the barrels wall thickness. A bargain gun is not a bargain if the barrels are made thin by excessive bore lapping (honing) and polishing in the attempt to remove pitting this type of fix still traps the unwary regularly today. At this time there where a large number of second user guns around especially in rural areas but you really needed to know how to separate the honest gun from one made to look the part for a quick sale. The most popular bore sizes where the ubiquitous 12 bore the .410, 16, though 20 bores seemed far less common than they are today. After I made a couple of rather disastrous gun acquisitions at Auctions I decided I had to do something in order to improve my chances of purchasing sound examples of the gun maker�s art, so some form of measuring device was required. Being a young engineer just starting out in life I did know what was needed but had little spare cash to purchase the extremely expensive ready made items that would probably only see use two or three times a year, any way my money was taken up by the more important things in a young mans life, guns, cartridges, beer, oh! And the opposite sex!
Now before we start there is few things that should be understood when I first started to make this thickness gauge knowing no better my first design was two bars fitted in to a block of hard wood complete with a Micrometer head at one end it looked the part but it was totally useless and not because of the wood.
It was so unstable when it came to that all important zeroing and use it was just not readable at all because of your hand movements. After this not so auspicious start I had a talk to one of the old time engineers in the workshop and he gave me a demonstration that I have never forgotten from that day to this. Along the back of our workshop where a stack of 12 x 9 inch universal steel �I� beams with one of the beams sticking out of the pile to a distance of about five feet. Now I could see I was in for a lesson when he said �go fetch a drop clock� (A drop clock is the old engineers name for a Dial Gauge) he put the Dial Gauge between the floor and the bottom end of the beam and sat on the beam and to my surprise there was a deflection showing on the gauge. Now I should say that he was a rather rotund gentleman but there was at least three tons of steel holding the beam down at the other end so it could only be him who was causing the deflection on the dial. That was the lesson!!! I could make the limbs of the gauge so thick as to make it impractical to use but it would not stop deflection.
I did not come up with a perfect design right away it sort of evolved over time, there where many attempts but I had one stipulation that never changed whatever design I came up with it had to cost next to nothing, with no use of specialised tools in their making and what ever the design was it must be made at home on the kitchen table. To make something on the kitchen table is sort of a Brit saying, most people do not have a well equipped workshop and the only bench they have is �the kitchen table� and a lot of fine things over the years have been produced in this way.
The starting point was what ever idea I came up with it had to be easy to use, infinitely adjustable to make up for inaccuracies in its make up, small as practicable, and must be able to measure shotgun barrel at the standard UK proof distance of nine inches from the breech face. The accuracy had to be good enough to tell if the gun was worth buying, so with trial and error over a long period of time the eventual design I came up with makes the Gauge compact in size stable in use light to carry, and this aspect puts my personal stamp on its inception and eventual final design. Even though the design is my property I am quite happy for any individual to manufacture one of these gauges for their own personal use, though I am quite sure prior use and intellectual property would come in to the equation if a production for profit enterprise where started, though we could always talk about it if someone wanted to give it a try.
The gauge in this article I made very recently by hand using new materials, I do have a well equipped workshop with all the machine tools needed to manufacture it in less than an hour, though to make it by hand using a drill press a selection of files thread taps and a small table vice and not forgetting the hack saw, did take considerably longer as you would expect. All steel and aluminium I used was purchased via e-bay as was the Dial Gauge and knobs. I can appreciate that not every body has the capability of producing great things with their hands, but still this may be worth a try because it is not as complicated to make as it may first appear plus the monetary sums involved are not that large compared to what you will have in the end. As an apprentice engineer back in my now dim past I was for ever being told when things did not go according to plan or disastrously wrong �A man who never makes a mistake never makes anything� I can assure you that no truer word has ever been spoken. Though just for political correctness I suppose it now should be �person rather than Man�
How it all works
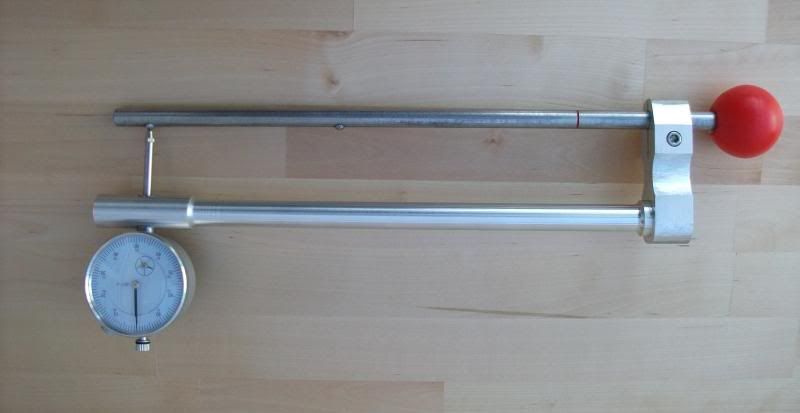
From the picture you will see that there are two bearing points on the gauge limb that enters the barrel. One is at the measuring point directly in line with the dial gauge and the other is placed a short distance away from the gauge point acting as a stabilizer/bearing. Also on the limb is a datum line that is cut in to the metal and filled with a coloured paint which is exactly 9 inches from the dial gauge measuring point.
The lower limb or outside limb holds the dial gauge in a clamp joint allowing for zero adjustment though its position is set at a fixed distance from the mounting block. As there is a single screw used in its fixing to the mounting block the limb is free to rotate bringing the dial gauge plunger in to line with the mounting block�s central axis.
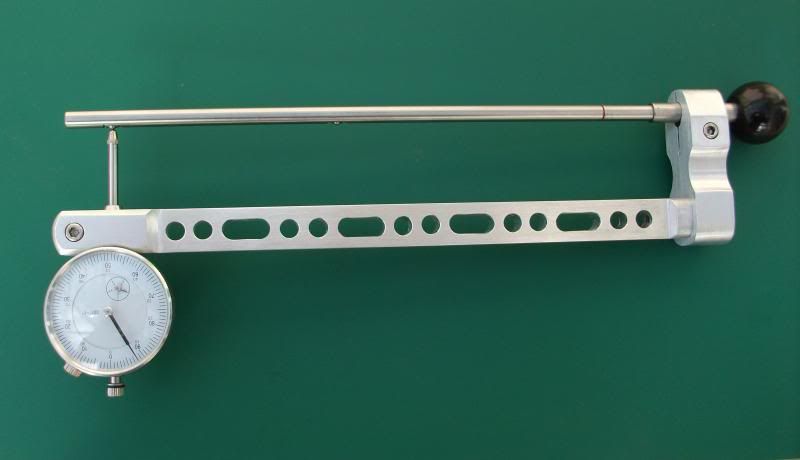
Now let�s start with the mounting block and the limb that enters the bore it is held in the block by a clamp joint which will allow full lateral and rotational movement, enabling the bearing measuring zero point to be brought into line with the dial gauge plunger and clamped firmly in that position, also this limb extends through the block to make a convenient mounting for the ball handle.
Now if you suspend the gauge from a flat surface you will observe that it will not sit on the zero reference point but on the stabilizer/bearing point. To bring the gauge to rest on the zero reference point we must add some form of counter weight, so as we proceed in making the gauge how we do this will become clearer.
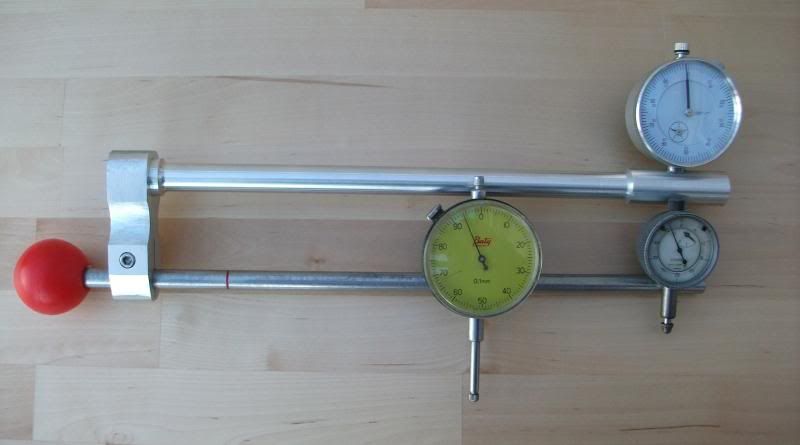
Various Dial Gauges used over the years
This is the list of bits and pieces you will need though keep it in mind that the sizes given are not set in tablets of stone so a little above or below the sizes I have recommended will be just fine. Now the way the world works here in Britland purchasing small amounts of metal on e-bay you use the nearest size you can because
Metric and Imperial sizes go hand in hand so I am not going to insult your intelligence by giving conversions from Metric to Imperial and visa versa.
100mm 1� x 1� inch Aluminium bar. (This was cut from a larger section)
305mm 20mm square Aluminium bar.
500 mm 10mm Stainless steel rod. For large bores
500mm 8mm Stainless steel rod. For small bores
2 5mm x 20mm hex cap screws. Use US equivalent thread sizes.
1 6mm x 25mm hex cap screws. ,,
2 7mm or � in ball bearings for large bores. These bearings are a standard 2 5mm or 3/32in bearings for small bores. type found in pedal bicycles
2 Plastic knobs.
Dial Gauge Range 0 � 1 inch Reading 0.001 inch 2inch diameter. Or:-
Dial Gauge Range 0 � 10mm Reading 0.01 mm 60 mm diameter.
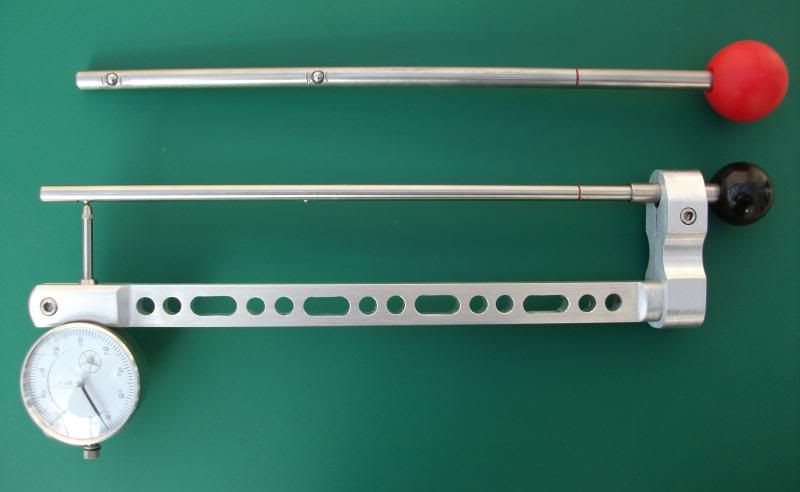
My first choice of material was Aluminium because it easy to cut and shape with hand tools as well as being light. You will notice from the first photograph the limb holding the Dial Gauge is round and the one in this article is made from square section the reason for this change is I did the shaping for the gauge using my lathe. But for this exercise hand tools and a drill press are the only tools to be used, also it is far more difficult in practice to hold centre and drill a round bar the so the use of the square made it far simpler square was used in all of my earlier designs. If you follow the drawings and remove the metal as shown the total weight of the gauge with the larger bore rod is 20 oz approximately 0.57 kg. I used stainless steel because it was available at the time at very little extra cost over mild steel and of course it does not rust though mild steel will work equally as well.
Because there are a number of photographs and drawings it is my intention to continue this posting in instalments because of its length also posting multi photographs is rather an arduous exercise because the image hosting site does not always do what you want. And on a personal note I did not appreciate how long a simple task takes to explain in writing. And lastly it can be a put off to people if there is to much talk so I feel it will be far less daunting to make the gauge if it is done in smaller parts.


