|
S |
M |
T |
W |
T |
F |
S |
|
|
1
|
2
|
3
|
4
|
5
|
6
|
|
7
|
8
|
9
|
10
|
11
|
12
|
13
|
|
14
|
15
|
16
|
17
|
18
|
19
|
20
|
|
21
|
22
|
23
|
24
|
25
|
26
|
27
|
|
28
|
29
|
30
|
|
|
|
|
|
|
6 members (earlyriser, eightbore, Argo44, Karl Graebner, dogon, 1 invisible),
1,187
guests, and
7
robots. |
|
Key:
Admin,
Global Mod,
Mod
|
|
|
Forums10
Topics38,468
Posts545,130
Members14,409
| |
Most Online1,258
Mar 29th, 2024
|
|
|
|
Joined: Feb 2002
Posts: 1,850 Likes: 150
Sidelock
|

Sidelock
Joined: Feb 2002
Posts: 1,850 Likes: 150 |
A simple way to see if there is oil in the wood,
Take a flat screw driver blade and press it (the tip & flat) down onto the wood and draw it backwards a small amt,,maybe 1/8" or so.
If there is oil in the wood, it's just under the surface and doing this little technique will squeeze the oil out.
The surface that the blade compresses will become 'wet', that's the oil. Sometimes a small puddle even forms in the tiny depression and the tip of the screwdriver is also wet with oil.
Do this in the inside of the stock of course,,in the inletting, under a grip cap or butt plate.
You can also use a knife blade held almost flat to the surface. Raise the back edge just a bit an pull it back. The edge does the same thing as above and compresses the wood slightly and squeezes out any oil if it's there.
The wider knife blade can be used on the outside areas of the wood if you don't get carried away.
But compressing small areas of the wood is doing just that. So when it comes to (re)finishing time they can show unless you are going to do some wood removal or dent raising.
Stick to the internal surfaces when testing.
Most often it's in the inletting anyway. If it's there you can figure it's also soaked in further back into the grip area as well.
|
|
|
|
|
Joined: Feb 2008
Posts: 11,343 Likes: 390
Sidelock
|
|
Sidelock
Joined: Feb 2008
Posts: 11,343 Likes: 390 |
I like to start cleaning gun stock wood with something mild like Murphy's Oil Soap or dishwashing detergent. For wood that is oil soaked, I like to start with absorbents such as whiting or kitty litter, with gentle heat to help bring the oil to the surface. I have also found that a solution of household ammonia does a great job of removing old grunge and skin or gun oils that are on the surface. Ammonia turns oils into a soap, which then can be rinsed away with warm water. But remember to rinse off all ammonia residue completely because it can damage wood. I only resort to soaks in organic solvents such as acetone, lacquer thinner, etc. as a last resort. These harsh organic solvents will absolutely damage the cellulose and lignin structure of the wood, so soak times should be kept to an absolute minimum. Kutter's advice to go slow and easy, and to be very patient is priceless. The oil did not soak deep into the wood in a short time, and it will not come back to the surface in a short time either.
Oil removal will always be a compromise, and I do not believe that it is possible to remove all traces of oil that has soaked deep into the wood without causing even more damage to the wood. I learned this the first time I set a stock aside for a month or so after I de-oiled it. When I finally got ready to apply finish, I noticed that my nice clean wood had dark oily areas again, because the oil deep in the wood migrated back to the surface. The best we can hope for with deeply oiled wood is to arrest the damage and stabilize things before the wood becomes punky or rotted. I do agree with Geo that your forend wood does not look deeply oil soaked. But pictures can be deceiving. I'd be very cautious about sealing the end grain with CA or epoxy because any that gets on the exposed surfaces is going to affect the even penetration of any stains or stock finish you use. I won't repeat all of the reasons I prefer to use Titebond II wood glue versus epoxy when you are able to get most oil out of the wood, except to say that properly prepared joints are stronger than the wood, and it gives me a more invisible repair than anything else I have used. Of course, the crack shown at the butt end of your forend may not appear on the exposed surface.
A true sign of mental illness is any gun owner who would vote for an Anti-Gunner like Joe Biden.
|
|
|
|
|
Joined: Mar 2019
Posts: 109
Sidelock
|
|
Sidelock
Joined: Mar 2019
Posts: 109 |
Keith-what would be a method of general heat?
|
|
|
|
|
Joined: Jan 2002
Posts: 13,149 Likes: 1147
Sidelock
|
|
Sidelock
Joined: Jan 2002
Posts: 13,149 Likes: 1147 |
Trooper, Keith said gentle heat, not general.
Gentle heat : suspend over a radiator - use a hair dryer on a lower setting - let it in the sun on your truck dashboard on warm, clear afternoons - leave in your oven on the lowest setting overnight, etc.
SRH
May God bless America and those who defend her.
|
|
|
|
|
Joined: Mar 2019
Posts: 109
Sidelock
|
|
Sidelock
Joined: Mar 2019
Posts: 109 |
Thanks Stan I think auto-correct got me.
|
|
|
|
|
Joined: Dec 2019
Posts: 271 Likes: 20
Sidelock
|
|
OP
Sidelock
Joined: Dec 2019
Posts: 271 Likes: 20 |
Thanks, all. I am contemplating my next action to close the split. Close examination shows it to be very shallow and tight. I am thinking of two steps. First wicking some CA into it and second filling it with epoxy applied to warmed wood to close it up. I followed great advice given here and used Titebond II on my Lefever G to very good results however the split is so tight that I do not think it will work in this case.
Last edited by LetFly; 11/27/20 10:36 AM.
|
|
|
|
|
Joined: Dec 2019
Posts: 271 Likes: 20
Sidelock
|
|
OP
Sidelock
Joined: Dec 2019
Posts: 271 Likes: 20 |
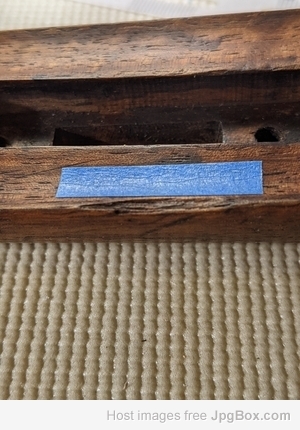
Split cleaned, sealed and filled. 
|
|
|
|
|
Joined: Dec 2019
Posts: 271 Likes: 20
Sidelock
|
|
OP
Sidelock
Joined: Dec 2019
Posts: 271 Likes: 20 |
As with each project I start out thinking I will do a little light clean up but then... Here is the next item to repair on the forend. A small divot along the left barrel border. The divot is 20mm in length. Piece gone a long time and wood is worn smooth. I have repaired these in the past with AcraGlas. On this Parker I am open to other suggestions and advice. I would like to repair with laid in wood sliver matching grain but I have not done this so help welcome. 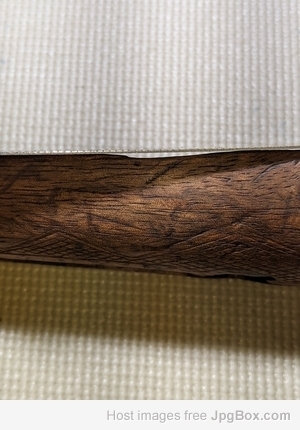
Last edited by LetFly; 11/28/20 02:56 PM.
|
|
|
|
|
Joined: Dec 2019
Posts: 271 Likes: 20
Sidelock
|
|
OP
Sidelock
Joined: Dec 2019
Posts: 271 Likes: 20 |
Practice,and practice some more. Clearly not the Parker forend. 
|
|
|
|
|
Joined: Dec 2019
Posts: 271 Likes: 20
Sidelock
|
|
OP
Sidelock
Joined: Dec 2019
Posts: 271 Likes: 20 |
Note: spacing on the checkering on this 1893 Parker GH appears to be 22 lpi using a Dem-Bart lpi template.
|
|
|
|
|
