doublegunshop.com - home
Posted By: PhysDoc checkering tutorials - 05/14/20 03:39 AM
I'd like to learn how to checker this summer, I would like the help of those of you that taught themselves how to checker, what are the good threads, video's etc that helped you the most and why?
Posted By: Woodreaux Re: checkering tutorials - 05/14/20 12:10 PM
Haven't taught myself yet, but the Facebook checkering page has lots of inspiring posts and it seems to be a good community for questions, etc.

https://www.facebook.com/groups/832682070080205/?ref=share
Posted By: rocky mtn bill Re: checkering tutorials - 05/14/20 06:16 PM
PhsDoc, I learned to checker by reading Monty Kennedy's book and doing what he says. One thing that has changed significantly since that book is tools. By all means start with carbide cutters. Dem Bart cutters just don't hold up. If you're only going to do a few jobs, hand tools are fine, and they need to be where you begin. Otherwise get a power outfit as soon as you see you're in this for the duration.Steven Dodd Hughes recently edited a new checkering book, and I recommend you get it. Some recommend starting to checker by recutting old work. I say that's not a good idea. Recutting checkering has its own set of challenges. Practice on good quality scraps of English walnut.
Posted By: SDH-MT Re: checkering tutorials - 05/14/20 10:01 PM
The book is titled The Final Touch: a Complete Course in Gunstock Checkering, by Joel Schafer. Joe unfortunately passed away earlier this year but the book has some internet availability, I think from Ullmann Precision carbide tool maker.
I didn't really edit it, but at his request, I made suggestions to Joel of how I though that he could improve it; and he did.

BTW: As much as I consider Monte Kennedy (who I visited in 1975 at his lakefront shop and sat at his checkering horse/bench on Flathead Lake) a fabulous gunstocker and pioneer, his checking book leave too much to be desired, IMO.

Re-cutting is a great way to get started, certainly gives a familiarity with the tools. I've been teaching my apprentice Oliver Wilderson to checker the past few months. He began re-cutting a Rem 700 extensive pressed pattern. He then did straight point pattern, 4 panels on a walnut Henry .22, really dressed it up!

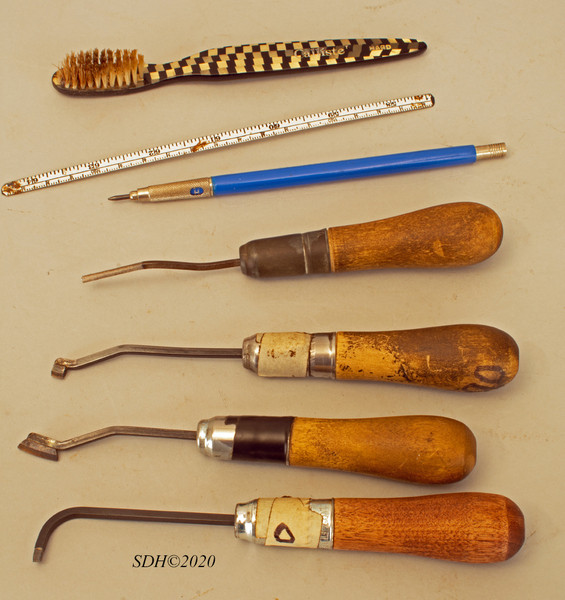
Now we are waiting for the pandemic to allow him to return to the shop and do a under-the-grip point pattern on a custom Marlin .44 lever gun we have been working on. Of course I have all the carbide checkering tools, layout tools, cradles, electric tool, carbide wheels and bench set-up for him to use.

I'm afraid this six+ week layoff hasn't done him any good as the more you checker the better you can get. Although I know you guys can't, or won't consider Seminars but James Tucker (who I consider and good as it gets for professional checkering) does a week long Checkering class at Lassen JC in north California. I think it might be cancelled this year? Some of my Stockmaking students took it last year and the reports were great! Cheap tuition, dorm accommodations and The Best instructions! Check it out. His work and some very good and very poor checkering is shown on the FB Forum.

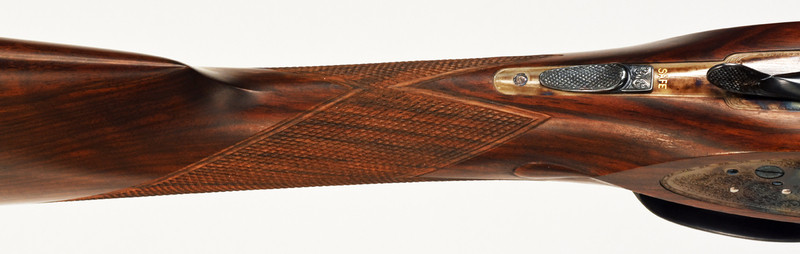
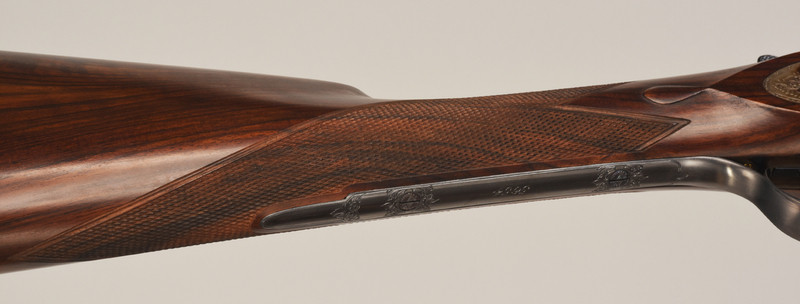
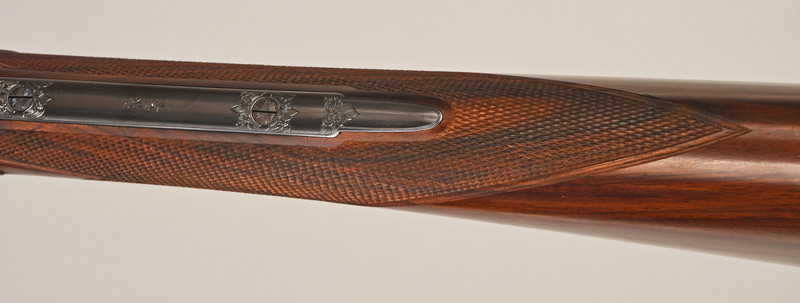
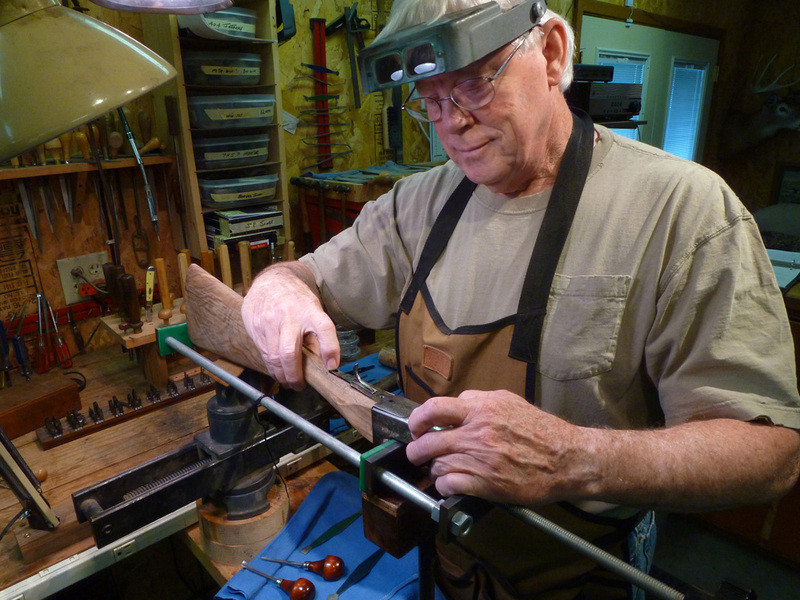
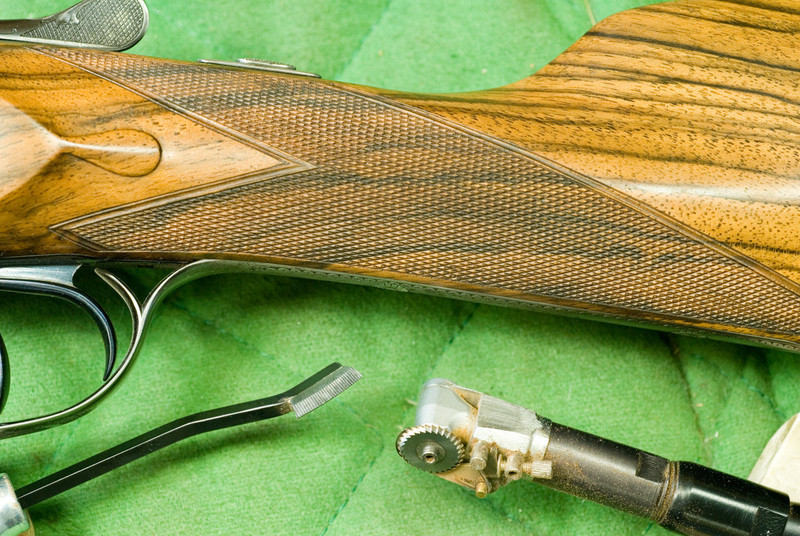
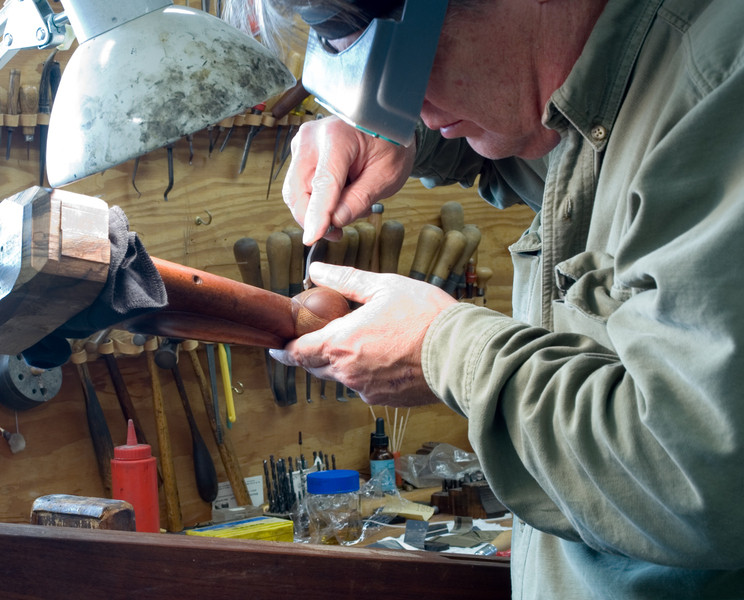
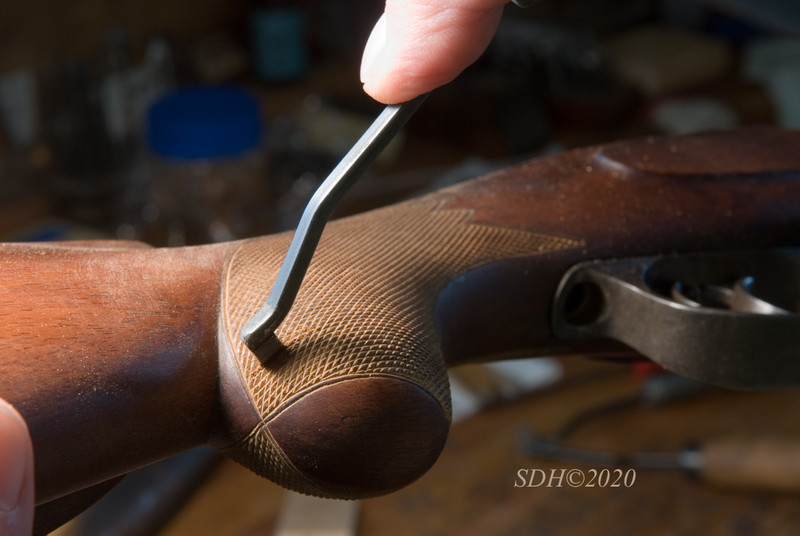
Here are pics of an all-the-way-around-the-grip panel I did on a slender grip custom Bertuzzi 20 ga. It is 25lpi with mullered borders, from about 1995.


Posted By: bluedcanoed Re: checkering tutorials - 05/14/20 11:04 PM
SDH, great photos and info. Thank you very much.


Bob
Posted By: Travis S Re: checkering tutorials - 05/14/20 11:36 PM
This is another great thread. Just finished my first DIY project. Not just quite ready to join the gunmakers guild but I feel what I did good I did good and what I KNOW I did wrong I know why so I can adjust on the next one and the What I DONT KNOW.... well the what I don't knows are why you pros that contribute are so appreciated.

I did the project on a field grade flues with all Dembart and Gunline tools. I could tell real quickly that the cutters should have performed a little better but I pushed though, literally and figuratively.

My post project thoughts:
- Use as lite a hand as you can. This way the mistakes YOU WILL MAKE are more easily remedied.
- Limit your checking session to no more than 1-1.5 hours at a time. Evaluate and rest in between at least a half day. I found that my attention waned quickly in the beginning and I had to build a tolerance for sticking with it but yet still stopping early enough that I was not feeling like I was working instead of enjoying a new hobby.
- Do not try to get your lines to depth but maybe to 75% depth until all lines are cut then go back over and do final depth and cleaning. I do not know if that is the right way to do it but my second side went better/looked better than the 1st by doing this.

Good luck with your start up Doc.

Steve, what vendor is your go to vendor for tools and also that welcome a newbie like me.

Many thanks

Travis
Posted By: SDH-MT Re: checkering tutorials - 05/15/20 06:50 PM
I use almost all Ullmann carbide tools including wheels for the electric tool. Also have a "long jointer" I got from Brownells decades ago that I've very carefully sharpened with a fine 3-cornered file. These carbide tools are expensive and difficult to recommend to the casual hobbiest.

I use ONLY pull cutter (cut on pull stroke rather than push). I start with a 75* wheel with the electric tool asnd would do the same with a hand tool. After two passes I change to a 90* tool to point-up.

Your advice about time is Very good. Unfortunately us Pros have to extend that. My limit is 2 hours, get up, stretch, walk around, uncross my eyes, etc then one more session for the day. When I start making mistakes, I've been at it too long.

I'm not in the shop right now, will see if I can shoot a photo later...
Posted By: craigd Re: checkering tutorials - 05/15/20 07:23 PM
If a parrot from the hobbyist point of view can comment, I think Steven has made some great comments. I don’t think checkering tools function quite like any other. If I were starting today on my own, I’d watch videos and see if I could make practice cuts in a similar way.

Only thoughts, but the flat boards and blocks I practiced on were a bit too simplistic. I’d try to put a curve on at least some of the practice pieces. It’s not so easy to make a straight line, I think those jointers are worth considering. I hadn’t the thought that they might be sharpened. Though mine is low mileage, it been a steady helper since the mid eighties and I’ll ponder touching it up.

I think once someone moves past the feel of the tools and builds familiarity, get the Schafer book. It’s sad to read of his passing, but he left quite a memorable resource.
Posted By: SDH-MT Re: checkering tutorials - 05/15/20 11:43 PM
Here are a selection of my commonly used checkering tools. From the top:Dust Brush; piece of measuring tape for layout; Very soft lead pencil for layout; old style long jointer, 1" ; 3/16' cutter; 5/8" cutter; 3/32" cutter. All cutters are carbide from Ullman except jointer. The dirtier the handle, the more used. The 5/8" is the most used as it is long enough to keep straight and aggressive enough to get the job done. All cut on the pull stoke
Posted By: SDH-MT Re: checkering tutorials - 05/16/20 12:14 AM
More checkering pics:

My friend Joel Schafer a his checking bench.


Close-up of my custom Fox with electric tool head and cutter. The actual checking was done about 1993-94?


Re-cutting a commercial Mauser stock from about 1910


Close up of the back of the round knob grip, the most difficult part.


Electric tool with handpiece on power pack.

Posted By: rocky mtn bill Re: checkering tutorials - 05/16/20 01:20 PM
A further note about re-checkering: If the original pattern is distinct, like say the 700 stock with pressed checkering, then cutting it in can be good initial practice. If it's badly worn, re-cutting is much trickier than new work. In my experience, fixing worn checkering is best done by power tools. Just establish the master lines, set the tool to the proper spacing and proceed as if the stock never had checkering to start with. In the worst cases, I scrub the old lines with acetone and a stiff brush to clean away dirt and oil,then trowel on a layer of epoxy to rebuild the worn stock contours. Once the epoxy hardens and is smoothed up, it can be checkered pretty much like wood, and it isn't hard to stain it to the right shade.
Posted By: Travis S Re: checkering tutorials - 05/20/20 08:11 PM
I just received my copy of Joel's book, I can't wait to get into. It. At first glance it looks well worth the price.
Posted By: Travis S Re: checkering tutorials - 05/22/20 04:40 PM
Joel's book is awesome. Is there anything out there that steps out the actual stock shaping process like Joels does for checkerig?
Posted By: keith Re: checkering tutorials - 05/22/20 08:55 PM
Originally Posted By: Travis S
Joel's book is awesome. Is there anything out there that steps out the actual stock shaping process like Joels does for checkerig?


I think you would like "Professional Stock Making; Through The Eyes of a Stockmaker" by David Wesbrook:

https://www.amazon.com/Professional-Stockmaking-Through-Eyes-Stockmaker/dp/1879356155
Posted By: Travis S Re: checkering tutorials - 05/30/20 03:58 PM
Thanks Keith I will look into that.
Posted By: SKB Re: checkering tutorials - 05/30/20 04:05 PM
That was our text book in school, good stuff and affordable once again after Dave had a second printing run. A good reference for the basics of stock design. I loaned my copy to a client and explained to him that without understanding the concepts in the book you can not build a properly shaped stock. I rarely build from a blank anymore but when I do I follow all the principles outlined in the book, the same holds true when I build a pattern. Westbrook was a world class photographer as well.
Posted By: SDH-MT Re: checkering tutorials - 06/03/20 07:30 PM
A trick I figured out long ago for repairing checkering or fixing screw-up in new patterns. I Never use superglue nor epoxy. I mix walnut dust, (saved from cleaning up the electric cutter dust) and mix with Duco Cement. Duco is a very strong, rubberized type of glue not unlike rubber cement. It dries fast, hard and unlike epoxy or cryo is not shiny. It can be stained and recheckered almost like real wood.
I get it at Ace hardware. My Dad used Duco Cement for his wood model train car kits, scenery and just about everything else.
Posted By: builder Re: checkering tutorials - 06/03/20 08:41 PM
Thanks Steven.
Posted By: Mark II Re: checkering tutorials - 06/04/20 12:29 AM
Doc there is a section on the Accuratereloading forum about checkering. lots of pictures and so videos.
Posted By: rocky mtn bill Re: checkering tutorials - 06/06/20 02:18 AM
Well, OK. I'll get the '03 on Tues. and will report first impressions. I've been trying to use up stuff that's accumulated over that last fifty years or so. I have three good blanks for rifle stocks and two Mauser actions, one an Oberndorf commercial and the other a G33/40. I need bottom metal for one action. Earlier this week I ordered two Douglas barrels, one in 270 and the other 280. I'm not short of rifles, but I'm not good at being idle. Peace.
© The DoubleGun BBS @ doublegunshop.com